docker (2) - docker 간단 예제
간단한 image 만들기와 container 실행까지
docker 설치
docker 공식 사이트에서 설치파일을 받고 실행하자.
Docker Personal - Sign Up for Free | Docker
Docker Personal offers free access to an intuitive platform allowing developers to build, share, and run cloud-native applications.
간단한 web server image 만들기
우선 image를 만드는 과정이 적힌 Dockerfile을 만들어보자.
# Nginx의 공식 이미지를 기반으로 시작합니다.
FROM nginx:latest

# 작업 디렉토리를 설정합니다.
WORKDIR /usr/share/nginx/html

# echo 명령어를 사용하여 index.html 파일을 생성하고 내용을 작성합니다.
RUN echo '<html><body>hello world docker</body></html>' > index.html
이것으로 image를 만드려면 아래와 같이 하면 된다. 파일명이 Dockerfile이 아닌 경우에는 -f로 밝혀주면 된다.
docker build -t my-simple-web-server-image -f SimpleWebServerImageDockerFile .여기서 . 은 현재 디렉토리를 build시 컨텍스트로 전달한다고 한다.
image가 잘 만들어졌는지 확인해보자.
➜  hello-world docker image list
REPOSITORY                        TAG       IMAGE ID       CREATED              SIZE
my-simple-web-server-image        latest    ad9c9b8cdb4e   About a minute ago   192MB
image로 container 띄우기
이제 실행해보자. 다음과 같은 형식이다.
docker run --name 띄우고 싶은 container 이름 -d -p 포트대응 원본 image 이름
➜  hello-world docker run --name my-simple-web-server-container -d -p 80:80 my-simple-web-server-image

529eeed28cc58b04f95ddb2f8daa67c0108527deda799bcc0e47f57dce950cc4
➜  hello-world
➜  hello-world docker ps
CONTAINER ID IMAGE COMMAND CREATED STATUS PORTS NAMES
5221da2da70b   my-simple-web-server-image "/docker-entrypoint.…"   13 minutes ago
이렇게 하면 실행된 것이다. 여기서 -p 80:80은 host(우리가 쓰는 컴)의 port 를 container속의 port와 연결시켜 주는 명령이다. -p 443:443 을 추가하는 등 여러개를 쓸 수 있다.
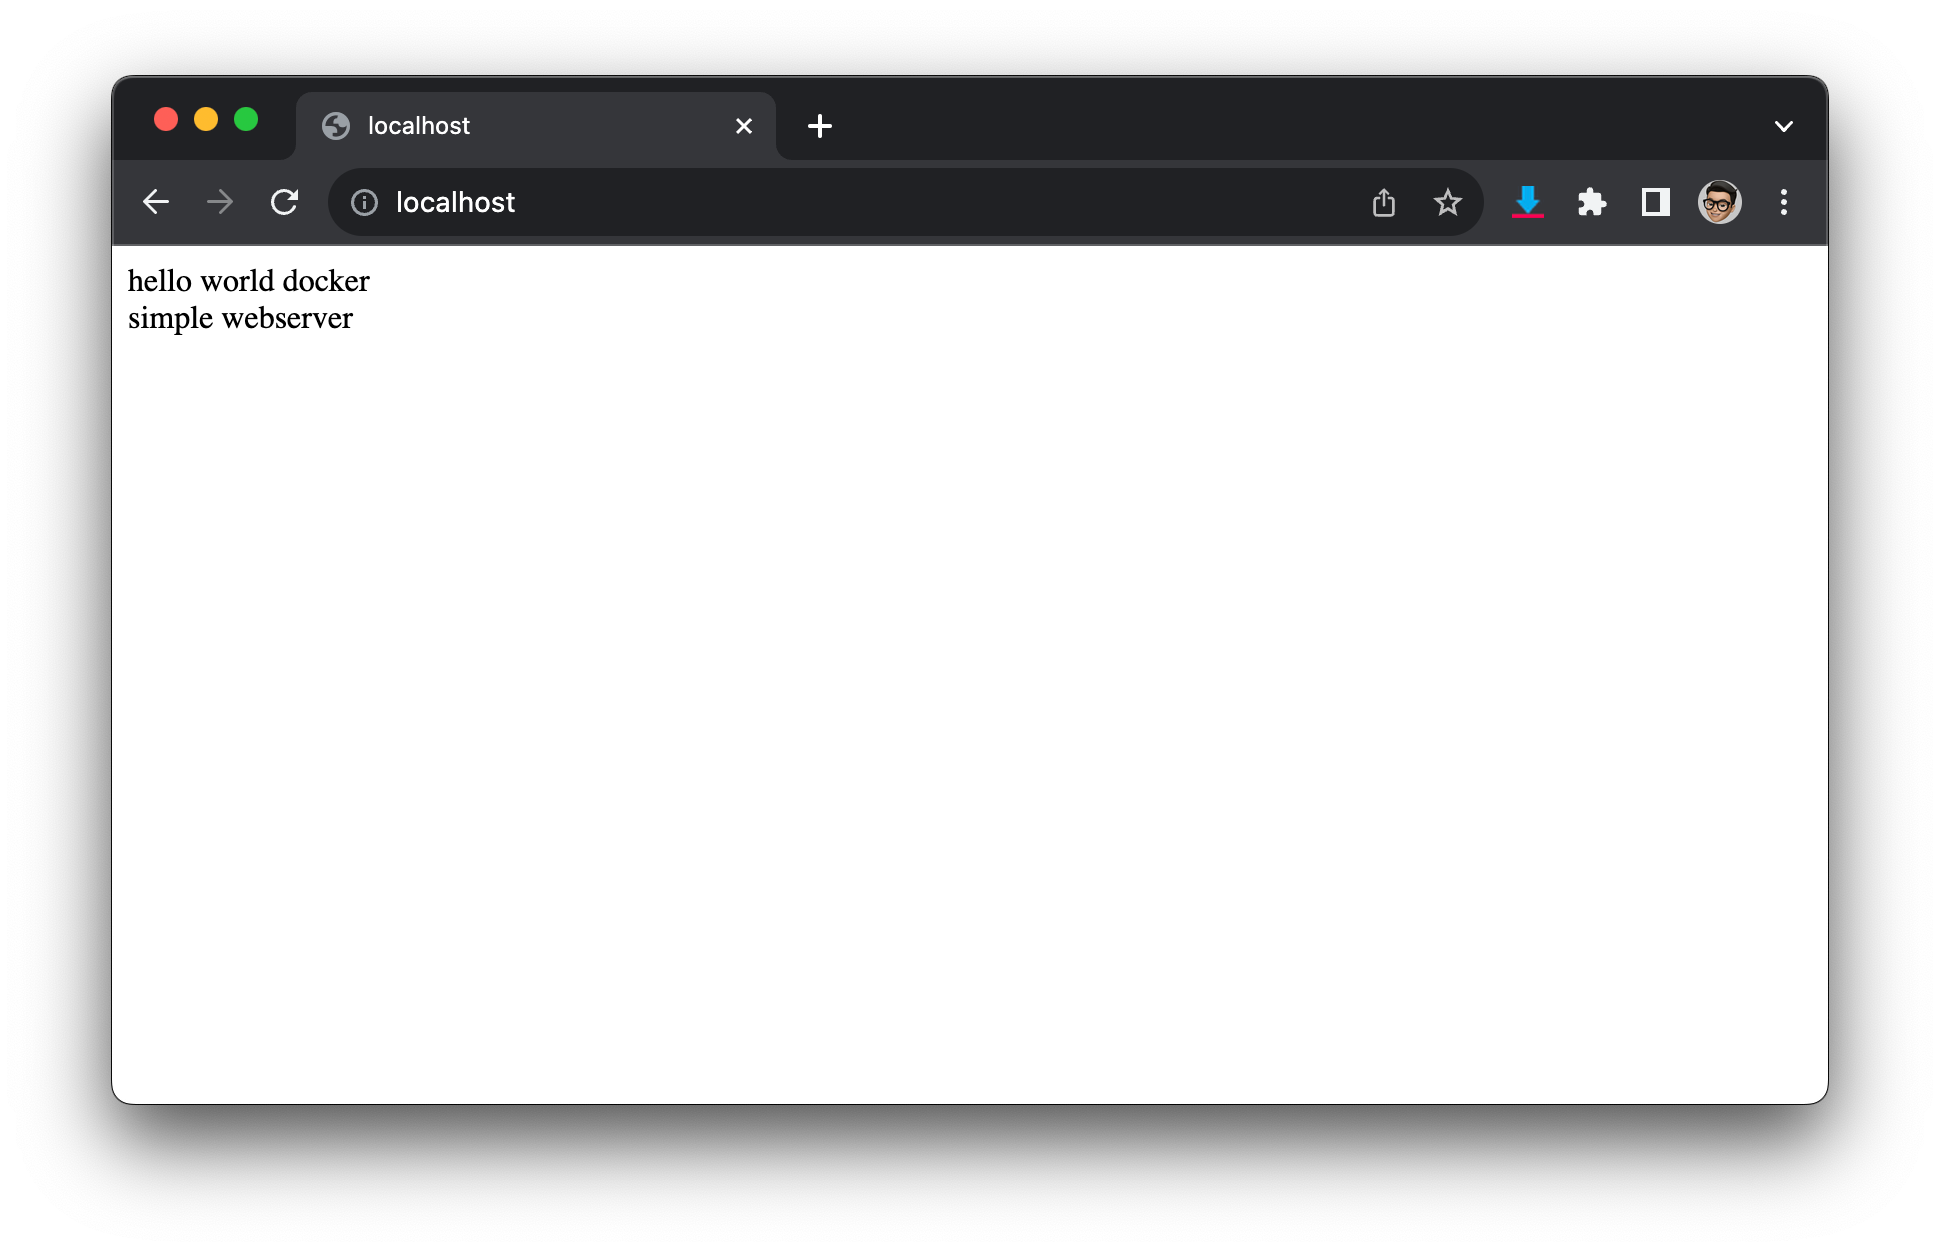
크롬으로 접속도 한번 해보자.
container 속으로 들어가기
이제 container 속으로 들어가 html 내용을 한번 수정해보자.
➜  hello-world docker exec -it my-simple-web-server-container bash
root@5221da2da70b:/usr/share/nginx/html# // 컨테이너 속으로 들어옴

root@5221da2da70b:/usr/share/nginx/html# ls
50x.html  index.html
root@5221da2da70b:/usr/share/nginx/html# cat index.html
<html><body>hello world docker<br>simple webserver</body></html> // 원래 내용

root@5221da2da70b:/usr/share/nginx/html# echo "<html><body>This is a new HTML</body></html>" > ./index.html // 내용을 교체해보자.
root@5221da2da70b:/usr/share/nginx/html# cat index.html
<html><body>This is a new HTML</body></html> // 새로운 내용이 들어왔다.

root@5221da2da70b:/usr/share/nginx/html# exit
➜ hello-world // container 밖으로 나옴 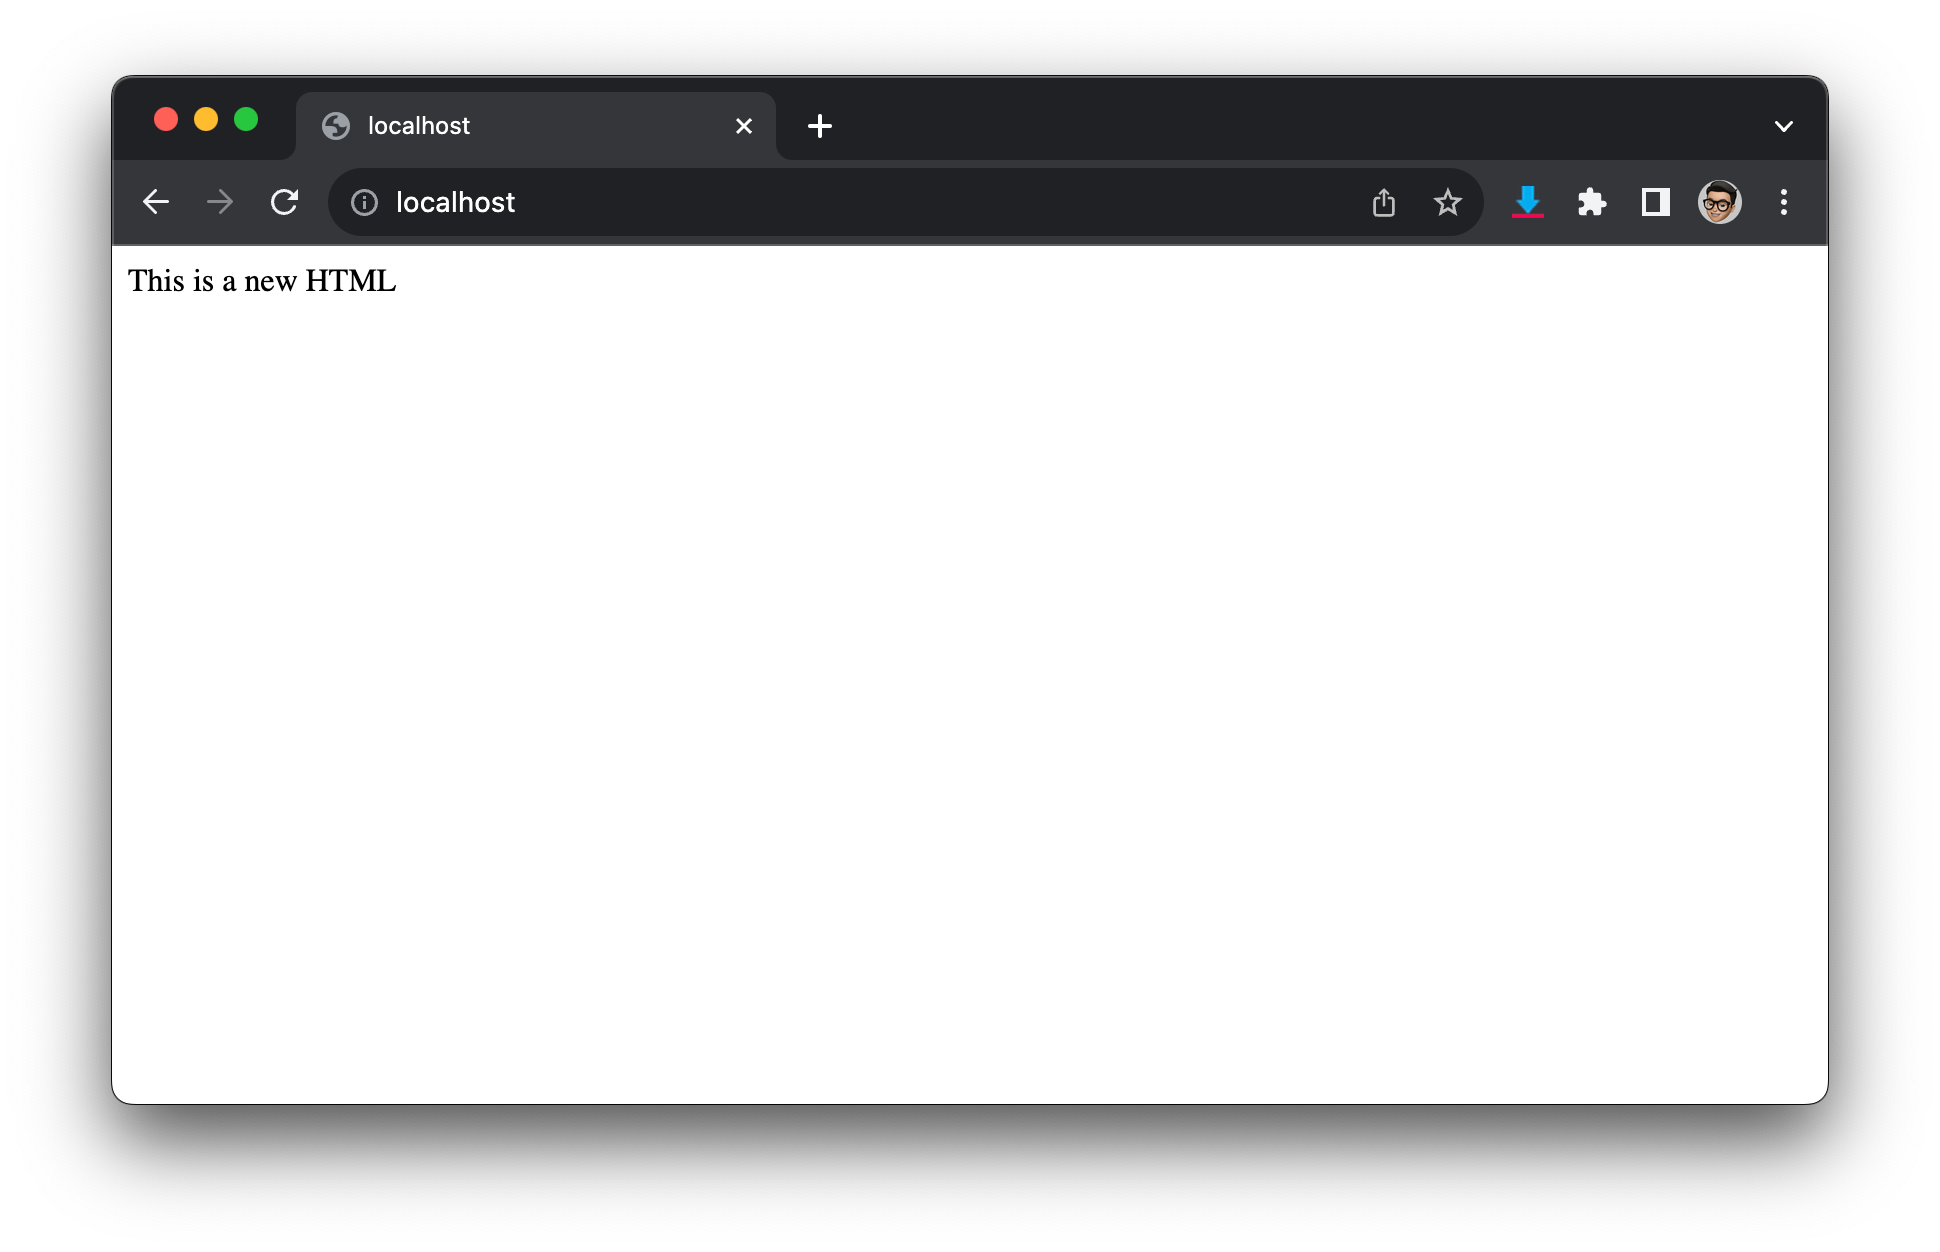
container의 한계
지금까지 image로부터 container를 띄우고, 들어가보고, 내용을 보거나 수정도 해 보았다. 그런데 여기서 다음과 같은 일련의 과정(컨테이너 삭제후 재시동)을 해보면 어떻게 될까?
➜  hello-world docker stop my-simple-web-server-container
my-simple-web-server-container
➜  hello-world docker rm my-simple-web-server-container
my-simple-web-server-container
➜  hello-world docker run --name my-simple-web-server-container -d -p 80:80 my-simple-web-server-image

67a96ee8392ad927665bc346890c9f4e57cb98c23b497bba47d46fd7bea4ea56
➜  hello-world docker exec -it my-simple-web-server-container bash
root@67a96ee8392a:/usr/share/nginx/html# cat index.html
<html><body>hello world docker<br>simple webserver</body></html> // 최초의 image 내용 그대로
root@67a96ee8392a:/usr/share/nginx/html#
컨테이너에 기록한 내용은 컨테이너가 삭제되는 즉시 사라진다. host의 어떠한 곳에도 저장되지 않는다.
이를 해결하기 위한 방법을 다음 글에서 알아보자.
